Tuesday, January 2, 2018

What curriculum do you use?

    It's January and I believe 18 degrees outside right now here in Columbia, Tennessee and there doesn't seem to be much hope of warmth coming anytime soon. I use to really hate and dread winter but since we've started schooling I actually really love the fact that I don't have to bundle my kids up and get out every day. We can enjoy the comfort of coffee, our dining room table, the couch and sometimes my bed for our schooling. But I do know that all too soon we will get stir crazy and want to get out.


  When the weather does cooperate we go to a few of our favorite places. We enjoy two different libraries and what they have to offer, the local children's museum, playgrounds and ballet lessons. As we are out, I always meet other homeschool moms and it doesn't take long in the conversation for the question to be asked "what curriculum do you use?" It always great to hear what others are using and what they have found is working wonderful for their family. We use a lot of things in our schooling and hearing that word "a lot" use to overwhelm me when listening to moms before we began schooling. Now I understand. When you homeschool you find yourselves doing so many educational things because kids naturally want to learn and explore. I've already found myself several times thinking "how in the world are we googling this?" but we are learning and anytime we can make learning fun I'm all about it.


   As I've mentioned in my last post I do need a plan and something as a base for all of our learning. Oh and maybe you're like me and need to hear that I don't hate anything we are using. It's all working well! So it is possible to buy resources and they work just fine. Don't be overwhelmed by all thats out there. I just needed a Chris Peters and a Julie Hull to tell me here is what you need and they helped me find just the right tools.

When it comes to our schooling I stick to the basics of reading, writing, arithmetic. We use the "Bible" subject throughout our day and thats probably for another post about our daily routine.

Here are 5 of the tools we have used or are using and work great for Pippa and I.

1. Reading - Teach Your Child to Read in 100 Easy Lessons
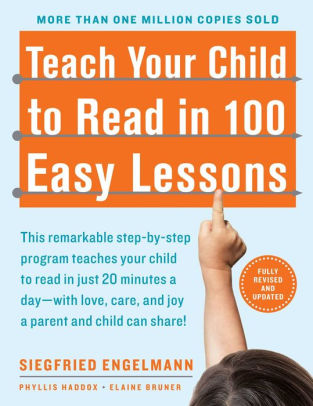
Teach Your Child to Read in 100 Easy Lessons

  With this book I've heard both sides. Either you love it or hate it. In this family it was loved! I started using this book last summer before we officially began K in the fall. She had just turned 5 in May and I felt like it was a good way to begin this pattern of "school" without throwing it all on her at once. We did it almost every single day (even weekends) so it wouldn't become negotiable. It worked out perfectly because at the end of this book we were about 2 months into schooling and she was reading so well. I will totally do this again with Sully.


  We used this book every day and it took about 15 minutes to complete each lesson. Some days were hard and there were almost tears but I encouraged her and we got through those tough days. Those tough days were worth it once she could read on her own!  There is nothing like teaching your child to read and seeing them become giddy about it. I mean pause-I taught my daughter to read! How cool is that?! I always had a candy jar with her favorite candy only for reading lessons. When she completed her lesson she could march over and get that piece of candy. I kept a chart handy and once we got 50 we went for ice cream and then at 100 she was able to pick out something at the store.


After we finished that book I transitioned her to these amish Pathway readers and workbooks that were suggested to me. I love them for their simplicity. If you go to find readers for a 5 year old you will find that it's very hard. These pathway readers have simple names like "Peter" and "Mother" instead of "Xenia" and "Cedric" etc found in disney and other common fun looking children's readers. These amish ones are straightforward, plain, black and white so she can focus.


2. Before we read
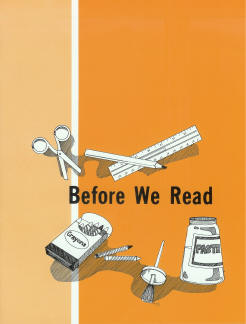
Grade 1 Pathway "Before We Read" Workbook
This workbook has lots of coloring, cutting, pasting and beginner reading exercises. My daughter loves crafting so this was perfect.

We are now into "First Steps". We use the workbook and reader. They have many more fabulous looking workbooks but I felt like these were sufficient for our needs.
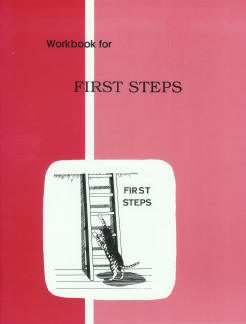
Grade 1 Pathway "First Steps" Workbook


Image result for Handwriting without tears
3. Handwriting - Handwriting Without Tears 

I purchased the workbook, teacher book, wooden alphabet manipulatives, small chalk board and the large one with double lines for learning lowercase and the music cd. I felt like these foundational tools were worth the investment because I wanted my kids to be able to read and write really well.


I love how wide this workbook lays. There is plenty of room to write and color on the pages.


I made my own "mat man" using bottle caps, pipe cleaners and card stock that is mentioned in the beginning lessons.


    This book also comes with a license to use their online learning tools too that we pull up from time to time to keep things fresh. 

4. Math-Math U See

 Math U See Integer Blocks  I bought the manipulatives that you can use all the way up through highschool. 
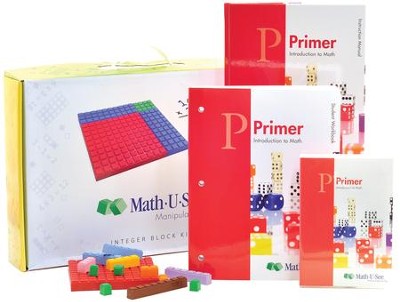
Math-U-See Primer Universal Set   -


The blocks are great or sometimes"flipazoos" for equations. :) 

    These manipulatives are wonderful. Even Sully uses them! 
   I must admit, at first I was worried about the videos that came with this curriculum. There is a very dry math teacher that teaches a lesson on the dvd once a week. To my surprise both of my kids love this part of the week. Something about that man makes Pippa laugh and she pays attention the whole time. Maybe because it's someone different than me for a change! Either way, it works for us. 


We also occasionally do some work on time. I purchased the Judy Clock and workbook. I think this summer I will focus more on time with her. It will be better without all the other subjects pulling at as. Judy Clock
Image result for judy clock
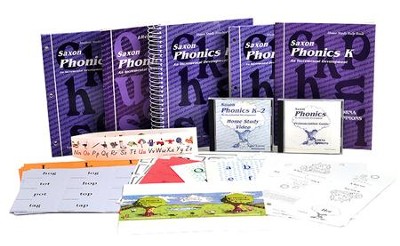
5. Lastly we use Saxon Phonics
Saxon Phonics K, Home Study Kit   -
 This was the first thing I bought last spring. I don't know that you HAVE to have a phonics curriculum but I will say I think it's been great for Pippa. We decided to go through this since I already had this before we knew how great the Teach your child to read in 100 easy lesson would be. 


   We can go back through and review the technical parts of sounds and words because the first book I mentioned doesn't really explain vowels and consonants. Sometimes I think she is way beyond this basic phonics curriculum and then other times I think this is great because its review of all these concepts she basically learned in the super fast method the Teach your child to read in 100 easy lessons book seems to use. Plus its kind of good that she can feel like she knows the answers fast. I can tell she feels super smart when we do phonics. 
  It also provides good skills like listening to directions and identifying. 


These are the foundations of our learning we do at the Howland home. Feel free to ask me specifics and I will do my best to answer. 

Blessings,

Amy 


Monday, January 1, 2018

Stick with it.

Ok friends,

   When I first began researching our materials that we would use for Kindergarten I kept reading on many homeschool blogs that if their student didn't like a certain curriculum they would just try another and honestly that stressed me out. It felt like this homeschooling thing would be a try this and that and I was scared of all the things I would have to invest in or find so my child would "like" learning.  I have never thought of myself as an educator until now and I personally needed a plan that wouldn't change. Don't get me wrong I totally love the freedom of using what you want for your schooling and I'm sure we will have times where things are just not working for us as a family so we throw it out but you have to also keep in mind one piece of advice a mom in our church said to me and it helped me find a sense of stability. She told me that "you just have to decide we're gonna stick with it". I had not heard that yet but it reassured me that sometimes you just have to teach yourself and your child the discipline of doing a task even if it's not "fun".

    Every child is different and what motivates them is different. I can honestly say that all the things we have used and are using have been great. I sometimes feel like somethings wrong because my child is for the most part participating and eager to do our schooling.

    I do believe there is great reward in teaching your child the discipline of completing tasks even if you don't "feel" like it. I have also learned that I am very much a stick to the plan gal and that I have to recognize when it's time to bump the breaks and know when to let off or when to do a little extra. I tell myself constantly that there isn't anything to prove to anyone. As long as we are making progress and sometimes progress looks different than you might think, then I can feel good about that.


   When we first began schooling I thought we could "school" year round because why not? But as we've now made it half way through one year, I think I have seen that our family needs real true breaks. I need time to just be Pippa's mom not teacher. We took an entire week off for Thanksgiving and we are taking two weeks of Christmas break because I promised we would "if you complete the work".  She did! :) I really think a summer break would be great for us too. Sure we will still read and review concepts but everyone needs breaks to refresh.


  Since we as a family have begun this homeschool journey I have had several mom's ask me what curriculum and methods we use. I'd like to share about two things in this post just specifically for the moms. I first want to say that pretty much everything I use has been suggested to me from seasoned homeschool moms and I am so thankful for their guidance. Having a support team around you giving reassurance that "you got this" is the biggest blessing. So if you have said "you can do it" to me, thank you again and please keep saying it! I can now with a smile say that these first 5 months of schooling has been so enjoyable for me. Pippa is interested and loves our school days so I count that as a win. My favorite thing right now is all the reading we are doing in our pajamas on cold mornings curled up by the tree.

2 things that I love for moms that have decided to do this homeschool thing!

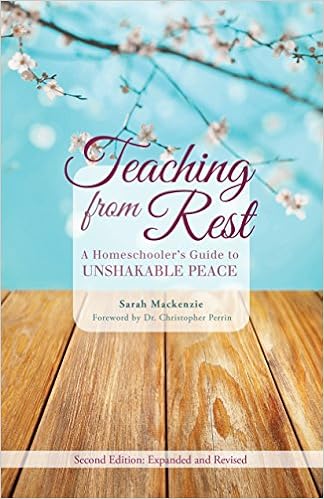
Teaching From Rest

I am not a reader... but I loved this book! I read it the summer before we started our official first day of K. I highlighted the junk out of it and I often return to it and it gives me the pep talk I sometimes need.

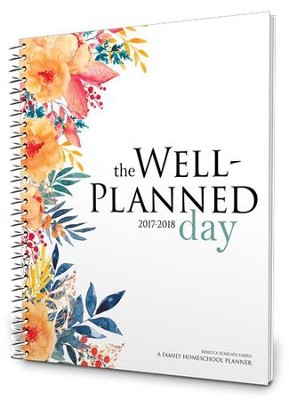
2 - The Well Planned Day  - This is my favorite thing ever...really.


My friend Julie that has now successfully homeschooled both of her children all the way through grade school suggested this wonderful spiril-bound planner. She said it was worth every penny and I have to say I'm sold now.  I will continue to splurge on this every year. This planner has brought more productivity to my life in general too. It has wonderful articles, quotes, shopping lists, Bible reading plan for each day, Christmas card lists, gift giving lists, field trip lists, budget sheets, attendance sheet, report cards and honestly its just so pretty and you need something pretty in your life if you're a stay at home mom!

I love to write in one weeks worth of plans (in pencil!) at a time (because your plans will have to change sometimes...ok a lot with a toddler in the picture too). Also anytime we do something that counts as school but it wasn't planned like library, crafts, baking, watching videos about animals, children's museum, playground, shopping trip- hey its math, creative play, coloring, painting etc I pencil that in! There's something about seeing a list of things we did that makes me feel better than if I have a set plan and we don't do everything exactly as planned.

That little check beside things feels so good!

I love the little tips and bible verses scattered throughout. 
There's room for everything in this planner. 


-

Friday, May 15, 2015

Pippa turns 3

I can't believe my little girl is 3 today. With a baby boy due any second now we weren't sure how to celebrate her birthday. My friend Michelle has been fixing up this adorable little vintage camper for a while now and I had the idea to take Pip and let her celebrate with her favorite stuffed animals in this camper. Pippa thought this was the coolest thing ever (I do too!). Michelle has put ALOT of hard work into making it so beautiful. It kinda changed my whole perspective on camping in the best way.  If you see me camping it will probably be like this!


This girl loves cupcakes....


We love you Pippa Lou! And we are so proud of you. 


Friday, April 24, 2015

Little Girl Maxi Dress

We are weeks away from meeting our little boy and I think I've about cleaned everything in our house twice. Nesting mode has come. Yesterday I needed something non strenuous but just fun to work on. If you know me very well you know that I hate sewing. I love the idea of it but almost every time I go to start a project something happens with my machine that makes me turn into the hulk. My sister can agree with me on this one. If I sew it's gotta be quick, cute and SIMPLE...like really simple.


Weeks ago I had seen a photo floating around on Pinterest of a little toddler maxi dress listed on etsy for a whoppin $42! Uhm no thank you. But it looked easy enough for me to try.

My little girl is turning 3 in May (the week we are due!) and I decided with no pattern to figure out her size. Here's what I did.

1. Went to hobby lobby with my 40% off coupon of course and picked out a yard of cute jersey knit fabric.

2. Went to Walmart and found a $3 coordinating tank top (could use a plain shirt). I'm sure you can find them in clearance now that I know what I'm looking for if I see them marked down.

3. Went home and wrapped my fabric around her itty bitty waist and then doubled it so I would have room to add a few pleats. The girl needs to be able to walk in it! I left the dress super long (which she preferred "like elsa mom"). At the end you can cut desired length. NO HEMMING yes!

4. Sewed the side together.

5. Cut the tank top off at where I I wanted the fabric bottom part to start and then turned it inside out, pinned my fabric to it making little pleats and sewed together.

6. She tried it on, danced and I trimmed the bottom where I wanted it.

That's it. And since I used no pattern I think I can continue to make these over and over as she grows.

$6 bucks. No hitting the sewing machine. No hemming. Easy. Cute. My kind of project!

Monday, February 16, 2015

Pippa's Dollhouse

Ever since I found out I was having a girl, almost 3 years ago, I dreamed of making a dollhouse for her. I looked for a second hand dollhouse on craiglist and yardsales but just didn't see anything. So my kind father in law made me exactly what I had in mind. It turned out perfect! 

I'm working on this while I wait for our baby boy scheduled to arrive in May. It's given me something to do while I grow and am stuck inside during these winter months and yes I know life will soon get very busy caring for our little guy but I'm soaking up every last bit of rest and recreation time I can before he comes. 

    27 weeks 


I started by painting the entire house white.

I then decopauged scrapbook paper to the backs of the rooms for "wallpaper".  

Some of the furniture was found on eBay, some I purchased bits at a time from Hobby Lobby using my 40% off coupon they always have up on their website. 

A lot of the prints came from HGTV magazines. 

All my fabric was scraps I had and all the little tiny pieces were from a bag a lady in our church gave me.
 Some things came from around my house that I would find and make into something. 

Never underestimate a toothpaste cap and the power of spray paint to make a stool for the bedroom. 

This is one of the most fun projects I have gotten to play with, I mean "design" 😊.  I've been working on it room by room over a few months and it is so much fun to watch Pippa see it room by room and get all excited. 


I only have two more rooms left, the living room and an office. I will add photos once it's complete and I can let go of it.  :) 


Thursday, August 7, 2014

Old New Jewelry

I love any kind of jewelry but along the way I have collected some pieces that have become favorites of mine because of the special occasions and people that have given them to me. The only problem is, they tarnished in a short amount of time.


Ever wondered how to get tarnished pieces of silver looking like new?  I recently found a new trick suggested online.


To get your silver back and sparkly clean simply rub the jewelry with dry baking soda using your fingers and watch as the tarnish disappear! I have to admit I became giddy during this process. It only takes a matter of seconds and the jewelry starts looking shiny. After you have throughly rubbed it with the baking soda just rinse with water and dry with a towel.


I cannot wait to wear my old pieces turned new!

Thursday, March 6, 2014

Weird Delicious Dip


Last fall Josh's parents came to visit us and his mom made this new dip that to be honest just looked weird! It's one of those things that I would not try unless prodded...well they warned us it was odd looking but after one taste it would leave you wanting more and more...and just a little more. It's so delicious and I started craving this weird dip this week! It's a little sweet but we like it a little saltier so I'm going to give you my modified version of the recipe that Josh's mom gave me.


Here's the recipe, I dare you to try it...

1 can of black beans rinsed
1 bunch of green onion chopped  (my sister has an awesome trick for making more of your green onion on her blog.)
1/2 cup of cider vinegar
1/2 cup of light olive oil
1 1/2 tbsp of  sugar (original says 1/4 cup but thats way too sweet for our salty palette)
Garlic powder, salt, pepper to taste (of course we always add salt like we would to guacamole)

We mix all the ingredients above and then let it sit for usually a day in fridge to let the ingredient flavors unite.
When you are ready to eat add  1 container of feta cheese.